

Cosplay costumes are special, as they require much work to make them look as realistic as possible. For this reason, you must use the right type of foam such as EVA foam or Moldable foam clay.
In this article, we are going to walk you through step-by-step how to use EVA foam for Cosplay.
If you have been looking to get into Cosplay, then stay tuned as this tutorial will help you make killer cosplay outfits.
What Is EVA Foam?
Before we get into the tutorial, we wanted to quickly explain what EVA foam is.
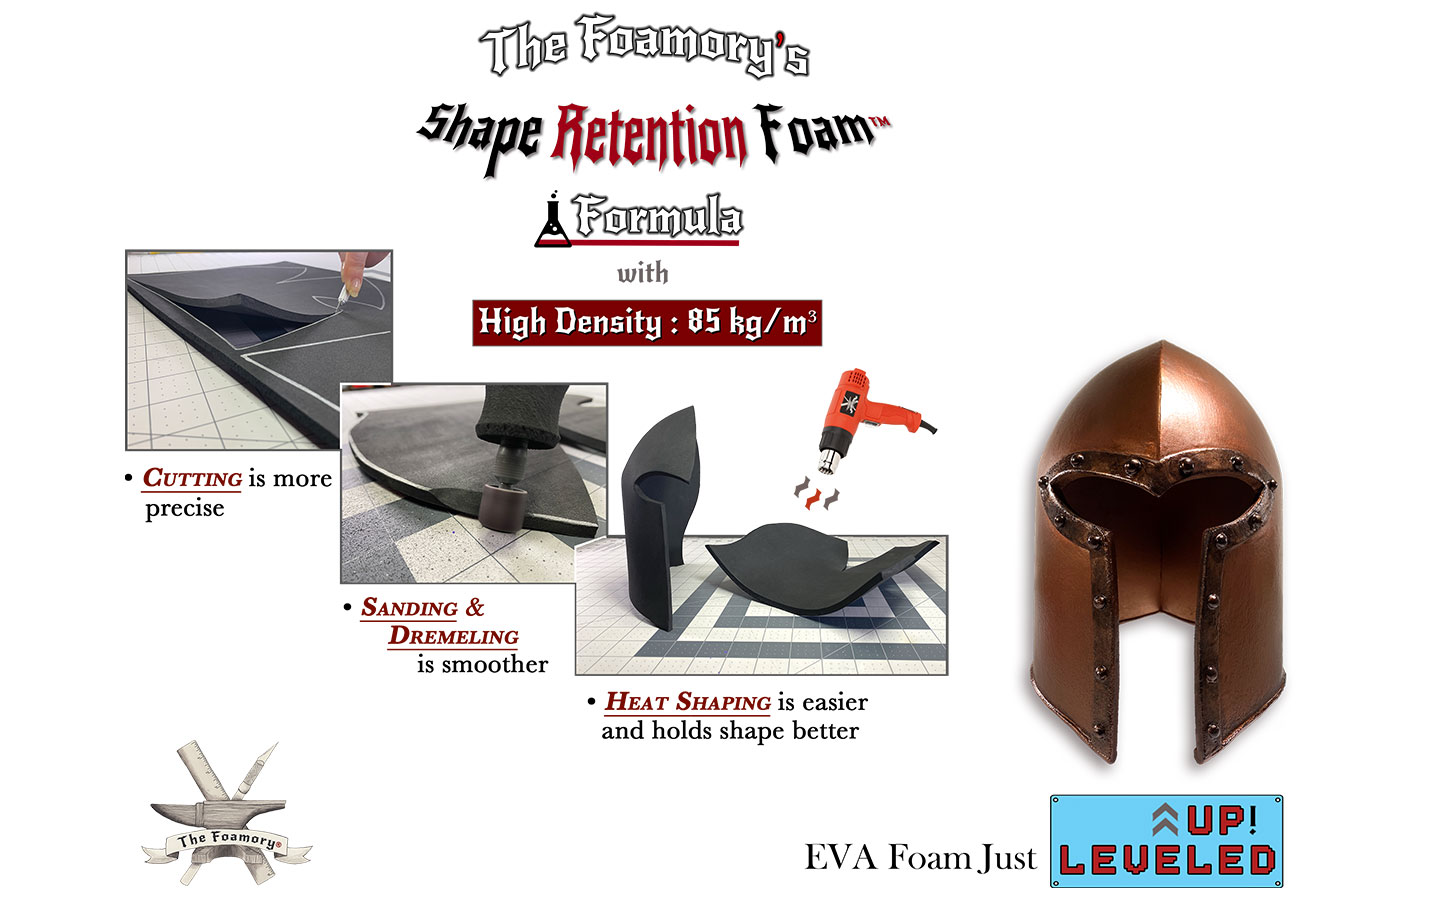
EVA foam is the densest foam used for Cosplay. It allows cosplayers to create outfits that won’t fall apart or lose their shape, and also feel more realistic.
With most other types of foam, the costumes would break too easily which is why cosplayers use EVA foam, as it works best.
How To Use EVA Foam For Cosplay
The steps we’re going to take to use the EVA foam for Cosplay include:
- Unbox
- Roll out & Flatten
- Sketching
- Cutting
- Sanding
- Heat Shaping
- Adhesives
For this tutorial, we’ve used our high-density EVA foam. However, it should work the same if you already have EVA foam from somewhere else, as long as the quality is good, and the density is high.
You can watch the video below, or read the text version beneath it for further details.
Step 1: Unbox
The first step you need to take is unboxing the foam.
Here it’s important that you don’t cut too deep into the box, as this could damage the foam.
If you’re unsure how deep to go, use the knife to gently and slowly cut a hole into the box so that you get an idea. Once you have done so, unbox the EVA foam, and it out of the package.
Step 2: Roll Out & Flatten
Next, you need to roll it out on a flat surface, so that the entire matt of foam is rolled out.
Now, use books to keep the corners flattened out by placing them on the corners.
Step 3: Sketching
It’s time to get sketching!
Sketch the shapes of your costume’s parts using a silver liner. You can use a ruler or something similar to make sure your lines are straight where they need to be.
Step 4: Cutting
Once you have sketched the shape of your costume, it’s time to get cutting.
You can use a sharp knife to cut the shape of your costume.
Step 5: Sanding
Once you have cut out the shapes, you need to sand the edges using a Dremel.
This makes the edges feel and stick better, as it prevents any bumps and keeps it smooth.
Step 6: Heat Shaping
Next, you need to shape the foam using a heat gun.
Hold the heat gun close to your foam, so that it heats up and makes it easier to shape.
Then, shape it the way you would like.
Step 7: Adhesives
Lastly, you need to stick any edges that belong together onto each other.
For this, you are going to need an adhesive. Contact cement is our preferred choice, but you can also use barge.
Voilà
And, that’s it!
We hope you have enjoyed this tutorial on how to use EVA foam for Cosplay.
If you would like to read more on Cosplay, you can check out some of our articles below. Or, you can also visit our shop for high-density EVA foam and Moldable foam clay.
Related Articles: